
Best Camera Settings for Interior Property Photography
Starting points for aperture, ISO, shutter speed and white balance — and how to bracket so windows and interiors both hold detail.
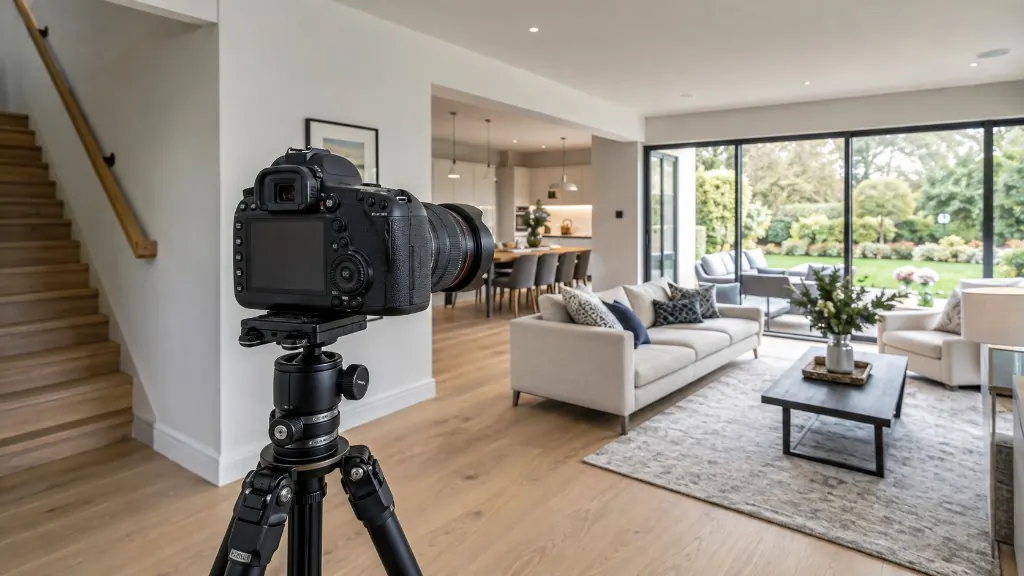
Key Takeaways
- Lock aperture and ISO; bracket with shutter speed.
- Start at f/8, ISO 100–200 and three frames at −2, 0 and +2 EV.
- Check the histogram — the darkest frame should hold the windows, the brightest the shadows.
- A tripod and locked focus keep the set aligned for a clean HDR merge.
Interior property photography presents a challenge that cameras do not always handle well: a room may contain dark corners, artificial lighting and extremely bright windows at the same time.
If you expose the photograph for the room, the windows can become completely white. If you expose for the view outside, the interior may appear dark and uninviting.
The most reliable solution is to use a tripod, keep your aperture and ISO consistent, and capture a series of bracketed exposures that can be combined into a natural-looking HDR photograph.
The best interior property photography settings
For most interiors, use these settings as your starting point:
| Camera setting | Recommended starting point |
|---|---|
| Shooting mode | Aperture Priority or Manual |
| Aperture | f/8 |
| ISO | 100–200 |
| Image format | RAW |
| White balance | Auto or approximately 4,000–5,000K |
| Bracketing | Three exposures at −2, 0 and +2 EV |
| Drive mode | Continuous or bracket burst |
| Focus mode | Single autofocus or manual focus |
| Shutter release | Two-second timer or remote release |
| Camera support | Tripod |
| Focal length | Approximately 16–24mm on a full-frame camera |
These are starting points rather than rigid rules. The ideal settings will change depending on the size of the room, available light, camera sensor and brightness of the windows.
Quick answer: what are the best settings?
For a typical interior, place the camera on a tripod and select Aperture Priority mode. Set the aperture to f/8, ISO to 100 or 200 and image quality to RAW. Turn on Auto Exposure Bracketing and capture three images at −2, 0 and +2 EV.
Use a two-second timer or remote shutter release to prevent camera movement. Your camera will adjust the shutter speed for each exposure while keeping the aperture and ISO consistent.
This gives you:
- One darker exposure to preserve window and highlight detail
- One normal exposure for the midtones
- One brighter exposure to reveal detail in darker areas
The exposures can then be merged into a finished HDR property photograph.
Why interior photography often requires HDR
A camera can only record a limited range between the darkest and brightest parts of a scene. This is known as its dynamic range.
Modern cameras have excellent sensors, but a bright window and a relatively dark room can still exceed what a single exposure can capture. You may therefore encounter one of two problems:
- The room looks correct, but the windows are overexposed.
- The windows retain detail, but the interior is too dark.
HDR photography overcomes this by combining information from several exposures. The darker frame contributes highlight and window detail, while the brighter frame provides information from the shadows.
The objective should not be to create an exaggerated or heavily processed “HDR effect”. For professional property photography, the finished result should appear clean, realistic and balanced.
Best aperture for interior property photography
An aperture of f/8 is the best starting point for most rooms.
At f/8, most wide-angle lenses provide a useful combination of:
- Good front-to-back sharpness
- Strong corner detail
- Sufficient depth of field
- Minimal loss of sharpness from diffraction
You can use f/9 or f/11 when the composition contains objects very close to the camera and you need greater depth of field. However, routinely using f/16 or f/22 is not necessary and can reduce overall sharpness because of diffraction.
For wider room views, f/8 will normally keep the important parts of the scene in focus, particularly when using a 16–24mm focal length.
For close-up detail photographs, such as taps, worktops, furniture or decorative features, you can use a wider aperture such as f/2.8 or f/4 to create a shallower depth of field.
Best ISO for interior property photography
Use the lowest practical ISO that produces a clean file and manageable exposure times.
For most tripod-based interior photography, that means:
- ISO 100 for maximum image quality
- ISO 200 for a slightly faster workflow
- ISO 400 in particularly dark rooms or when bracket exposures become excessively long
A higher ISO makes the image brighter but also introduces more digital noise and reduces editing flexibility. Because the camera is mounted on a tripod, there is usually no need to increase the ISO simply to obtain a faster shutter speed.
ISO 100 or 200 is therefore the best choice for most property interiors.
There are exceptions. If the brightest bracket is taking several seconds and people, curtains, plants or other objects are moving, increasing the ISO to 400 may help shorten the exposure. Modern full-frame cameras can often produce very clean results at ISO 400.
Best shutter speed for interior photography
There is no single correct shutter speed for interior property photography.
Once you have selected your aperture and ISO, the shutter speed controls the brightness of each exposure. In Aperture Priority mode, the camera calculates this automatically. In Manual mode, you adjust it yourself.
Depending on the room, the shutter speed could be:
- 1/60 second in a bright, sunlit room
- 1/4 second in a typical interior
- One second or longer in a dark room
- Several seconds for the brightest frame in an HDR bracket
Slow shutter speeds are not a problem when the camera is securely mounted on a tripod and nothing within the room is moving.
If you are photographing people or moving objects, you will need a faster shutter speed, additional lighting or a higher ISO.
Should you use Aperture Priority or Manual mode?
Both can produce excellent results.
Aperture Priority mode
Aperture Priority—shown as A or Av on most cameras—is usually the fastest option.
You choose the aperture and ISO, while the camera selects the shutter speed. When Auto Exposure Bracketing is enabled, the camera changes the shutter speed for each frame without changing your depth of field.
This is particularly useful when moving quickly between rooms with different lighting conditions.
Manual mode
Manual mode gives you complete control and provides consistent exposures across a property.
Set your aperture and ISO, select the shutter speed for the middle exposure and then capture the darker and brighter frames. Some cameras allow automatic exposure bracketing while operating in Manual mode.
Manual mode is useful when:
- The camera’s meter is being confused by bright windows
- You want identical results across several related compositions
- You are combining ambient exposures with flash
- You need precise control over the brightest and darkest frames
For most photographers, Aperture Priority is the easiest place to start.
How to set up HDR bracketing
Auto Exposure Bracketing, usually abbreviated to AEB, instructs the camera to capture several versions of the same photograph at different brightness levels.
A reliable starting point is:
- Three exposures
- Two stops between each exposure
- −2 EV, 0 EV and +2 EV
The three images should capture highlight, midtone and shadow information.
When should you capture five exposures?
Three exposures are sufficient for many rooms, particularly when using a modern camera with good dynamic range.
Consider capturing five exposures when:
- The room is very dark
- Strong sunlight is entering through the windows
- Retaining a clear exterior view is important
- The property contains dark furniture or finishes
- The scene includes several different sources of artificial light
A typical five-frame bracket might be:
−4, −2, 0, +2 and +4 EV
You do not necessarily need every frame when processing the photograph, but capturing the additional exposures gives you more information to work with.
Read the complete bracketing guide
Check the histogram, not just the camera screen
The image on the rear screen can be misleading, especially in a dark property.
Use the histogram and highlight warning to check your exposures.
For a complete bracket:
- The darkest frame should preserve important window and highlight detail.
- The brightest frame should contain visible detail in the darkest parts of the room.
- The middle frame should provide a balanced exposure for the main interior.
If the windows are still flashing as overexposed in your darkest photograph, capture an additional darker frame.
If the shadows remain almost completely black in the brightest photograph, add another brighter exposure.
Best white balance for interior photography
Interior properties frequently contain mixed lighting. Daylight entering through a window may look blue, while lamps and ceiling lights may appear warm or orange.
There are two practical approaches.
Auto White Balance
Auto White Balance works well with many modern cameras, particularly when shooting RAW. It is fast and normally provides a reasonable starting point.
Because RAW files retain the original colour information, you can adjust the white balance during editing without significantly reducing image quality.
Fixed Kelvin white balance
A fixed white balance provides greater consistency across a property.
Try starting between 4,000K and 5,000K, then adjust according to the lighting:
- Lower values produce a cooler result.
- Higher values produce a warmer result.
- Daylight is usually around 5,500K.
- Warm household lighting may be closer to 2,700–3,200K.
A fixed Kelvin value can prevent the colour balance from changing unexpectedly between bracketed exposures or adjacent rooms.
Should you turn the property’s lights on?
There is no universal rule.
Turning lights on can make a room feel warmer and more welcoming, but it can also introduce colour casts and draw attention to inconsistent bulbs.
Consider leaving the lights on when:
- The fittings are part of the room’s design
- The property has attractive feature lighting
- The natural light is limited
- The intended style is warm and inviting
Consider turning them off when:
- Different bulbs produce conflicting colours
- Ceiling lights create harsh pools of light
- Daylight already illuminates the room evenly
- You want a cleaner architectural appearance
Whichever approach you choose, try to remain consistent throughout the property.
Focus settings for sharp interior photographs
Use Single Autofocus rather than continuous autofocus. Focus once, then prevent the camera from changing focus between bracketed frames.
A practical method is:
- Select a focus point approximately one-third of the way into the room.
- Autofocus on an object with a clear edge.
- Confirm that the important foreground and background areas are sharp.
- Switch to manual focus or use back-button focus to lock the setting.
- Capture the complete bracket without refocusing.
Avoid focusing automatically on every frame. Small changes in focus can make the bracket more difficult to align and merge.
Use a tripod and remote release
A tripod is one of the most important pieces of equipment for interior property photography.
It allows you to:
- Use a low ISO
- Capture slow exposures
- Maintain identical framing across the bracket
- Keep the camera level
- Produce sharper images
- Create consistent compositions throughout the property
Use a remote shutter release, camera app or two-second timer so that pressing the shutter button does not move the camera.
If your lens or camera has image stabilisation, check the manufacturer’s guidance. Some systems should be switched off during long tripod-mounted exposures because they can introduce slight movement when none needs correcting.
Camera height and composition
Camera settings alone will not produce a professional-looking interior photograph. Camera position is equally important.
For most rooms, position the camera approximately 1.2 to 1.5 metres above the floor. Kitchens may require a slightly higher position to see worktops properly, while bedrooms and bathrooms may benefit from a slightly lower viewpoint.
Keep the camera level rather than tilting it upwards or downwards. This helps vertical lines remain straight and reduces the amount of perspective correction required later.
Use the camera’s electronic level or grid display and check:
- Door frames are vertical
- Walls are not leaning
- The horizon is level
- The composition does not include too much ceiling
- Important furniture is not awkwardly cropped
Best lens and focal length
A wide-angle lens is normally required, but excessively wide focal lengths can distort the room and make it look misleadingly large.
Useful starting ranges are:
- Full-frame camera: approximately 16–24mm
- APS-C camera: approximately 10–16mm
- Micro Four Thirds: approximately 8–12mm
Use the longest focal length that allows you to show the room clearly. Moving slightly backwards or finding a better camera position will often create a more natural result than immediately selecting the widest possible setting.
For most average-sized rooms, approximately 18–20mm on a full-frame camera produces a balanced perspective.
Recommended settings for different situations
Bright room with large windows
- Aperture: f/8
- ISO: 100
- Bracketing: Three or five frames at two-stop intervals
- White balance: Auto or approximately 4,500–5,000K
- Priority: Preserve the exterior view in the darkest frame
Small bathroom
- Aperture: f/8
- ISO: 100–200
- Focal length: Use a wide lens carefully
- Bracketing: Three frames at two-stop intervals
- Priority: Keep the camera level and avoid exaggerated distortion
Dark bedroom
- Aperture: f/8
- ISO: 200–400
- Bracketing: Three or five frames
- White balance: Check for mixed window and lamp light
- Priority: Make sure the brightest bracket contains clean shadow detail
Kitchen
- Aperture: f/8–f/11
- ISO: 100–200
- Camera height: High enough to show the worktops without revealing too much of their surface
- Bracketing: Three frames at two-stop intervals
- Priority: Watch for reflections and colour casts under cabinets
Exterior property photograph
- Aperture: f/8
- ISO: 100
- Bracketing: Usually one or three exposures
- White balance: Daylight or Auto
- Priority: Protect the sky from overexposure
Common interior photography mistakes
Using an unnecessarily high ISO
A high ISO may provide a faster shutter speed, but it can introduce noise and reduce the quality of the finished image. Use a tripod and keep the ISO low whenever possible.
Shooting handheld
Even if the middle exposure appears sharp, the brighter frame may require a much slower shutter speed. Handheld brackets can move between frames and create alignment problems.
Changing the aperture between exposures
The aperture controls depth of field. Changing it during a bracket can alter both focus and lens characteristics. Keep the aperture and ISO fixed and vary the shutter speed instead.
Using an excessively wide lens
Ultra-wide images may initially look impressive, but they can stretch furniture and make rooms appear unrealistically large. Aim for a spacious but believable representation.
Overprocessing the HDR result
Heavy contrast, excessive saturation and unnatural window detail can make an image look artificial. Professional property photographs should be bright and polished while remaining credible.
Forgetting to shoot RAW
RAW files contain substantially more image information than JPEGs and provide greater control over exposure, colour, highlights and shadows.
Processing your bracketed property photographs
Once you have captured the bracket, the exposures need to be aligned, merged and edited.
A typical workflow includes:
- Importing the RAW exposures
- Correcting lens distortion
- Aligning the bracketed frames
- Merging the exposures
- Balancing window and interior brightness
- Correcting white balance and colour casts
- Straightening vertical lines
- Applying noise reduction and sharpening
- Exporting the finished photograph as a high-quality JPEG
HDRPhoto is designed to simplify this stage of the property photography workflow. Upload your bracketed exposures and the platform processes them into a finished HDR property image without requiring a complicated manual editing process.
Shoot RAW for the archive. JPEG is the recommended upload format for HDRPhoto.
This is particularly useful for photographers who need to process larger property shoots consistently or deliver finished images quickly.
Final camera settings checklist
Before photographing each room, check the following:
- Camera mounted securely on a tripod
- Aperture set to approximately f/8
- ISO set to 100 or 200
- RAW image format selected
- Auto Exposure Bracketing enabled
- Three frames at −2, 0 and +2 EV
- Single autofocus or locked manual focus
- White balance set consistently
- Two-second timer or remote release enabled
- Camera level and vertical lines straight
- Darkest frame protects the windows
- Brightest frame contains shadow detail
Once these settings become part of your normal workflow, you can concentrate on composition, room preparation and producing a consistent set of photographs across the property.
The best camera settings provide the clean source images. Careful HDR processing then turns those exposures into bright, balanced and professional property photographs.
Frequently Asked Questions

HDRPhoto Editorial
Property photography editors
Practical guides on HDR property photography, camera settings and editing workflows, written by the ReHub Studio team that builds HDRPhoto.
Try HDRPhoto on a real shoot
Upload brackets or singles and review the merged photographs in the browser.
10 free HDR edits every month until 31 December 2026. No card required.
Related Articles

Lightroom HDR vs Automatic Property Photo Processing
Compare Lightroom HDR Merge with automatic property photo processing. Discover which workflow suits real estate photographers, estate agents and high-volume shoots.
The Complete Property Photography Workflow: From Preparation to Delivery
A repeatable property photography workflow from brief and kit check to HDR processing, quality control and delivery.
How HDRPhoto Studio Works
Upload a property folder, let HDRPhoto group timed brackets, review the merged JPEGs and download the set — one ReHub credit per finished image.