
The Complete Property Photography Workflow: From Preparation to Delivery
A repeatable property photography workflow from brief and kit check to HDR processing, quality control and delivery.
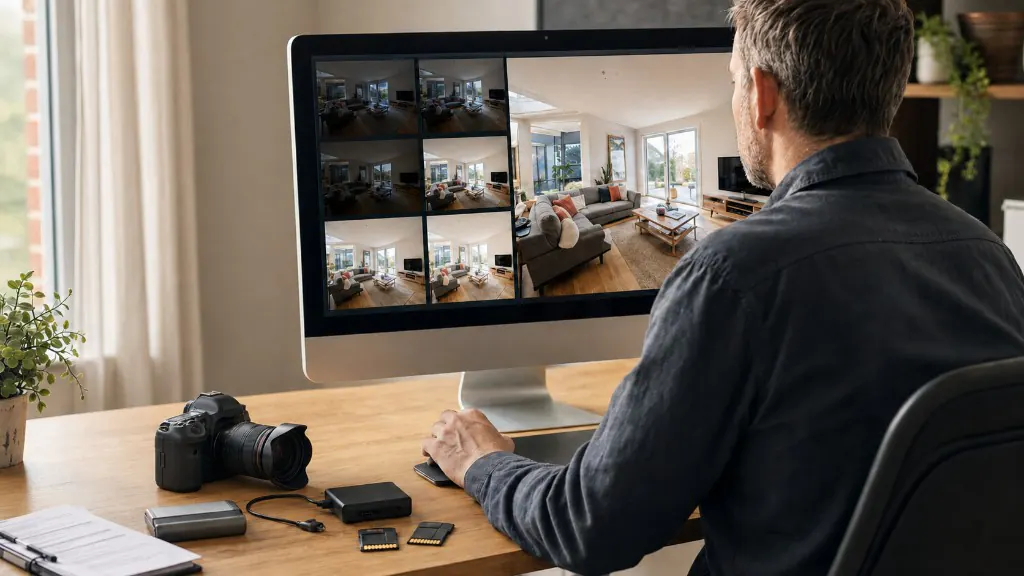
Key Takeaways
- Confirm the brief and kit before you arrive.
- Walk the property, then shoot rooms in a repeatable order with locked brackets.
- Back up immediately, process the selected set, then review the whole gallery before delivery.
A reliable property photography workflow should produce consistently strong images without making every shoot feel like a new experiment.
The process begins before you arrive at the property and continues beyond the final photograph. Preparation, room order, camera settings, HDR bracketing, file organisation, editing, quality control and delivery all affect the speed and quality of the finished job.
This guide explains a complete property photography workflow that can be repeated across houses, flats, commercial buildings and larger residential developments.
What is the best property photography workflow?
A professional property photography workflow normally follows eight stages:
- Confirm the client’s requirements.
- Prepare and check your equipment.
- Walk through and prepare the property.
- Photograph each room methodically.
- Capture exterior and detail photographs.
- Back up and organise the original files.
- Process, correct and review the images.
- Export and deliver the final gallery.
For HDR property photography, each main composition is usually captured as three or five bracketed exposures. These exposures are combined during editing to retain information in bright windows, darker corners and the rest of the room.
The objective is not simply to work faster. It is to create a repeatable process that reduces mistakes, improves consistency and makes delivery times easier to predict.
Complete workflow at a glance
| Stage | Main objective |
|---|---|
| Booking and brief | Confirm what the client needs |
| Equipment preparation | Avoid preventable problems on site |
| Property walkthrough | Plan the shoot and identify priorities |
| Room preparation | Remove distractions and improve presentation |
| Photography | Capture consistent compositions and brackets |
| File management | Protect and organise the original images |
| HDR processing | Create bright, balanced finished photographs |
| Quality control | Identify technical or presentation problems |
| Export and delivery | Supply correctly sized, ordered files |
| Archiving | Retain recoverable project files |
1. Confirm the property photography brief
Before the appointment, establish exactly what the client expects.
Important questions include:
- What type of property is being photographed?
- How many bedrooms and reception rooms does it contain?
- Are exterior photographs required?
- Are there any communal areas, gardens or outbuildings?
- Does the client want detail and lifestyle photographs?
- Are drone photography, floor plans, video or a virtual tour also required?
- Are there particular features that must be highlighted?
- Where will the finished photographs be published?
- What is the required delivery time?
- Are there any access, parking or security restrictions?
An estate agent preparing a standard residential listing may require a straightforward set of wide interior and exterior photographs. An architect, interior designer or developer may expect more deliberate compositions, detail images and precise colour reproduction.
Clarifying this before the shoot helps you select the right equipment, allocate enough time and avoid discovering additional requirements after arriving.
2. Prepare your equipment
Create a standard equipment checklist and use it before every appointment.
A typical property photography kit includes:
- DSLR or mirrorless camera with manual controls
- Wide-angle lens
- Standard or short telephoto lens for details
- Sturdy tripod
- Remote shutter release or camera control app
- Spare camera batteries
- Empty memory cards
- Lens cloth and cleaning equipment
- Flash and wireless trigger, if required
- Small continuous light or torch
- Spirit level or camera electronic level
- Shoe covers
- Charger and power bank
- Backup camera body where practical
Charge every battery, format the memory cards in the camera and check that the camera’s date and time are correct.
Inspect the front and rear lens elements for marks. Dust and fingerprints may not be obvious through the viewfinder but can become visible around windows and other bright parts of the finished photograph.
Save your standard settings
Many cameras allow you to save settings to a custom mode. A property photography preset might include:
- Aperture Priority or Manual mode
- f/8
- ISO 100 or 200
- RAW image format
- Auto Exposure Bracketing
- Three exposures at two-stop intervals
- Two-second timer
- Single autofocus
- Evaluative or matrix metering
- Electronic level and grid display
Saving these settings reduces setup time and lowers the risk of beginning a shoot with an incorrect ISO, image format or bracketing mode.
3. Create the project before the shoot
Use a consistent project name for the booking, original files, edited images and client delivery.
A useful format is:
YYYY-MM-DD – Property Address – Client
For example:
2026-08-19 – 24 High Street – Example Estates
Within the project folder, create:
- 01 RAW
- 02 Selected
- 03 HDR
- 04 Final
- 05 Web
- 06 Archive
You can adapt the structure to your workflow, but use the same system for every property. Consistent folders make it easier to find files, repeat edits and recover previous work.
4. Walk through the property before photographing it
Do not immediately set up the tripod in the first room.
Walk through the complete property and identify:
- The most important rooms
- The strongest selling features
- The direction of the natural light
- Rooms with difficult window exposure
- Mirrors and reflective surfaces
- Items that need moving
- Views between connected spaces
- Exterior areas that may benefit from changing light
- Any rooms that are not ready
The walkthrough helps you choose an efficient shooting order.
If sunlight is moving quickly across the property, photograph the most time-sensitive rooms first. If the front elevation is currently in shadow but will receive better light later, leave it until the end.
5. Prepare each room
Small adjustments can make a substantial difference to a property photograph.
Before photographing a room:
- Open curtains and blinds consistently.
- Straighten cushions, bedding and chairs.
- Hide visible cables, bins and cleaning products.
- Remove toiletries from bathrooms.
- Close toilet lids.
- Clear excessive items from kitchen worktops.
- Remove fridge magnets and personal paperwork.
- Straighten rugs and floor mats.
- Check that doors are positioned deliberately.
- Replace or switch off inconsistent light bulbs.
- Remove temporary signs and security devices where permitted.
The aim is not to strip every room of personality. It is to remove distractions that compete with the features buyers need to see.
Avoid moving valuable or fragile belongings without the owner’s permission. If substantial preparation is required, ask the client or property representative to handle it.
6. Choose the correct camera position
Most property photographs should help viewers understand the room, rather than simply make it appear as large as possible.
Start with the camera approximately 1.2 to 1.5 metres above the floor. Adjust the height for the room:
- Use a slightly lower position in bedrooms.
- Raise the camera enough to show kitchen worktops properly.
- Avoid photographing so low that furniture dominates the frame.
- Avoid photographing so high that the image contains excessive flooring.
Keep the camera level. Tilting upwards or downwards causes vertical lines to converge and makes walls, doors and windows appear to lean.
Use the electronic level or grid display to confirm that:
- Door frames are vertical
- Walls remain straight
- The horizon is level
- The composition does not contain too much ceiling
- Important furniture is not awkwardly cropped
Choose a natural focal length
A wide-angle lens is useful, but the widest available setting is not always the best choice.
Typical focal-length ranges are:
- Full-frame: approximately 16–24mm
- APS-C: approximately 10–16mm
- Micro Four Thirds: approximately 8–12mm
Use the longest focal length that explains the room clearly. Extremely wide compositions can stretch furniture, distort objects near the edges and make the room look misleadingly large.
7. Use consistent interior camera settings
A reliable starting point for most property interiors is:
| Setting | Recommended starting point |
|---|---|
| Shooting mode | Aperture Priority or Manual |
| Aperture | f/8 |
| ISO | 100–200 |
| File type | RAW |
| White balance | Auto or fixed Kelvin |
| Bracketing | −2, 0 and +2 EV |
| Focus | Single autofocus or manual |
| Drive mode | Continuous bracket burst |
| Shutter release | Timer or remote |
| Camera support | Tripod |
An aperture of f/8 normally provides a good balance of depth of field and lens sharpness. ISO 100 or 200 keeps noise low, while the tripod allows the camera to use slower shutter speeds.
Read the complete camera settings guide for interiors
8. Capture bracketed HDR exposures
Interior rooms frequently contain a greater range of brightness than a single exposure can record. A living room may have relatively dark furniture alongside windows receiving direct daylight.
Auto Exposure Bracketing captures the same composition at different exposure levels.
A standard three-frame bracket contains:
- −2 EV: darker exposure for windows and highlights
- 0 EV: middle exposure for the room
- +2 EV: brighter exposure for shadows
Keep the aperture and ISO fixed between frames. The camera should vary the shutter speed so that depth of field, focus and image noise remain consistent.
When should you use five exposures?
Three bracketed exposures will cover many property interiors. Use five exposures when:
- The room is particularly dark
- Windows receive direct sunlight
- Retaining the exterior view is important
- The interior contains dark furniture or finishes
- The dynamic range exceeds the three-frame bracket
A five-frame sequence might cover:
−4, −2, 0, +2 and +4 EV
Check the darkest frame to confirm that important highlight detail has been retained. Check the brightest frame to make sure useful information is visible in the deepest shadows.
See how many brackets a room typically needs
9. Photograph rooms in a repeatable order
Develop a consistent route through the property. For example:
- Entrance hall
- Main reception room
- Kitchen
- Additional reception areas
- Bedrooms
- Bathrooms
- Landing and circulation spaces
- Garden and exterior areas
- Detail photographs
A repeatable order reduces the risk of missing rooms.
For larger properties, use a written or digital shot list. Mark each room when you have completed its wide compositions, alternative angle and relevant details.
How many photographs should you take per room?
The number depends on the room and the client’s requirements.
As a general guide:
- Small bathroom or utility room: one strong composition
- Bedroom: one or two compositions
- Kitchen: two or three compositions
- Main reception room: two or three compositions
- Open-plan living space: three or more compositions
- Exterior: front, rear and important secondary views
Avoid producing several nearly identical photographs. Each image should reveal something new about the room, layout or property.
10. Capture connections between spaces
Property listings need to communicate layout as well as appearance.
Look for compositions that show:
- The kitchen connecting to the dining area
- The reception room opening onto the garden
- A bedroom leading to an en-suite
- The relationship between the hallway and main rooms
- Doors opening towards terraces or balconies
These photographs help prospective buyers understand how the property flows.
Open doors selectively when they reveal useful space. Close them when they create distractions, block features or expose an unprepared room.
11. Control mixed lighting
Daylight and artificial light have different colour temperatures. When both are used together, windows may appear blue while lamps and ceiling lights appear orange.
You can manage mixed lighting by:
- Turning artificial lights off and using natural light
- Using a consistent fixed white balance
- Replacing visibly mismatched bulbs
- Using bounced flash to create cleaner colour
- Correcting local colour casts during editing
There is no universal rule requiring all property lights to be switched on. Attractive feature lighting may improve the scene, while inconsistent ceiling lights can make an otherwise clean room harder to edit.
Choose the approach that makes the property look natural and remain consistent between related rooms.
12. Photograph the exterior
Exterior photography requires the same attention to perspective, lighting and presentation as interior work.
Before taking the photograph:
- Remove visible bins where permitted.
- Move vehicles if possible.
- Close garage doors.
- Straighten outdoor furniture.
- Remove hoses and temporary garden items.
- Check windows and external doors.
- Avoid including yourself in reflections.
Step back and use a less extreme focal length where space allows. This normally produces a more natural building perspective.
Capture:
- The main front elevation
- An angled front view
- The rear elevation
- Garden and terrace areas
- Garages or outbuildings
- Important views and surroundings
If the sky is significantly brighter than the building, capture a bracket for additional highlight and shadow information.
13. Review before leaving
Before packing away the equipment, conduct a final walkthrough.
Check:
- Every required room has been photographed.
- Important features are included.
- Brackets contain the expected number of frames.
- Images are sharp.
- Vertical lines are reasonably straight.
- Mirrors do not show the photographer or equipment.
- Windows are not completely overexposed in the darkest frames.
- No essential composition is blocked by an open door.
- Exterior photographs have been completed.
- Additional client requests have been covered.
Correcting a problem while still at the property may take two minutes. Returning for a second appointment could consume several hours.
14. Back up the images immediately
Do not format the camera’s memory card after the shoot until the files exist in at least two separate locations.
A safe process is:
- Copy the original files to the project folder.
- Copy them to a second local or cloud location.
- Confirm that the files open correctly.
- Retain the memory card until editing and delivery are complete.
For high-volume work, adopt a backup system that operates automatically whenever new project files are added.
A single copy of a shoot is not a backup.
15. Group and select the bracketed images
Before processing, remove:
- Test photographs
- Accidental shutter releases
- Duplicate compositions
- Frames affected by movement
- Images containing the photographer
- Compositions with obvious technical problems
Keep every usable frame belonging to the selected HDR sequence.
Bracketed exposures should remain together and in the correct order. Accurate grouping prevents an exposure from one composition being combined with images from another.
16. Process the HDR photographs
Traditional HDR editing can involve importing the bracketed exposures, aligning the frames, merging them, correcting the tone mapping and completing additional adjustments in separate software.
HDRPhoto is designed to simplify this part of the workflow.
Upload the bracketed exposures and allow HDRPhoto to create a balanced finished property photograph. Processing costs one credit per finished image, rather than one credit for every uploaded bracket. JPEG is the recommended upload format; keep RAW as an archive.
A complete processing workflow should address:
- Exposure blending
- Window and highlight control
- Shadow recovery
- White balance
- Colour correction
- Vertical alignment
- Lens distortion
- Noise reduction
- Sharpening
- Overall consistency
The final result should look bright and professional without appearing artificial.
17. Keep HDR editing natural
HDR is sometimes associated with exaggerated contrast, oversaturated colours and visible halos around windows or furniture. These effects result from excessive processing rather than the bracketing technique itself.
A professional property photograph should:
- Retain believable contrast
- Contain natural-looking colours
- Preserve important window information
- Avoid grey or muddy shadows
- Keep whites neutral
- Show straight architectural lines
- Remain consistent with the rest of the gallery
The purpose of HDR is to overcome the camera’s exposure limitations—not to make the property look unreal.
How to keep property HDR looking natural
18. Complete a quality-control review
Review the finished photographs as a complete set, not only as individual images.
Technical checks
Confirm that:
- Images are sharp at normal viewing size.
- White balance is consistent.
- Vertical lines are straight.
- Windows do not contain distracting halos.
- Noise is controlled.
- Reflections do not reveal equipment or people.
- There are no obvious blending or ghosting problems.
- Lens distortion has been corrected.
- Sensor dust spots have been removed.
Presentation checks
Ask whether:
- The property looks consistent from room to room.
- The gallery begins with one of the strongest images.
- Similar compositions have been removed.
- The images explain the layout.
- Brightness and colour remain consistent.
- The editing is polished without becoming misleading.
Check the photographs on more than one screen where possible. An image that looks balanced on a bright editing monitor may appear too dark on a typical laptop or phone.
19. Export the final files
Export settings should reflect how the photographs will be used.
For property portals and online marketing, clients normally require:
- JPEG format
- sRGB colour profile
- High-quality compression
- Suitable dimensions for web use
- Clear sequential filenames
You may also provide a separate high-resolution folder for brochures, window displays or printed marketing.
A useful delivery structure is:
- High Resolution
- Web Resolution
Use simple filenames such as:
- 24-High-Street-01.jpg
- 24-High-Street-02.jpg
- 24-High-Street-03.jpg
Numbering allows you to control the initial gallery order while making the files easy for the client to identify.
Avoid sending RAW files, unfinished brackets or working project files unless this has been agreed separately.
20. Deliver the photographs professionally
Use a gallery or file-delivery service that makes the images easy to preview and download.
The delivery should clearly state:
- The property address
- The number of finished photographs
- The available download sizes
- Any usage or licensing restrictions
- How long the download will remain available
- How the client can request an amendment
A clear delivery process is part of the overall client experience. Fast editing is less valuable if the client struggles to access or organise the finished files.
21. Archive the project
After delivery, retain enough information to recover or revise the job.
A complete archive may include:
- Original RAW exposures
- Selected bracket groups
- Finished master images
- Delivered JPEG files
- Client instructions
- Relevant licence or invoice information
The appropriate retention period depends on your business, storage capacity and client agreements. Make the policy clear in your terms rather than deciding individually for every project.
Property photography workflow checklist
Before the appointment
- Confirm the brief and property details
- Check access and parking
- Charge every battery
- Format memory cards
- Clean the lenses
- Check the tripod and remote release
- Confirm your camera settings
- Create the project folder
- Review the expected weather and daylight
At the property
- Walk through before photographing
- Identify the key selling features
- Prepare each room
- Open curtains and blinds
- Check lights and colour consistency
- Level the camera
- Capture complete brackets
- Review sharpness and exposure
- Photograph interiors, exteriors and details
- Complete a final walkthrough
After the appointment
- Copy and back up the files
- Group the brackets
- Remove unusable frames
- Process the selected photographs
- Correct perspective and colour
- Complete quality control
- Export web and high-resolution versions
- Deliver the finished gallery
- Archive the project
Build a workflow you can repeat
The best property photography workflow is not necessarily the one containing the most equipment, software or editing stages. It is the one you can repeat consistently.
Prepare the brief and equipment before travelling. Photograph the property in a methodical order. Capture enough exposure information for the editing stage. Back up the files immediately. Process the selected images consistently and review the entire gallery before delivery.
A repeatable workflow reduces mistakes, shortens turnaround times and allows you to concentrate on the parts of property photography that require judgement: preparation, composition and presenting each space clearly.
When your bracketed exposures are ready, upload them to HDRPhoto to create clean, balanced property photographs at one credit per finished image.
Frequently Asked Questions

HDRPhoto Editorial
Property photography editors
Practical guides on HDR property photography, camera settings and editing workflows, written by the ReHub Studio team that builds HDRPhoto.
Try HDRPhoto on a real shoot
Upload brackets or singles and review the merged photographs in the browser.
10 free HDR edits every month until 31 December 2026. No card required.
Related Articles
How to Photograph Property Interiors for HDR Editing
A practical shooting sequence for interiors you intend to merge — from lens choice and lights to the bracket itself.

Lightroom HDR vs Automatic Property Photo Processing
Compare Lightroom HDR Merge with automatic property photo processing. Discover which workflow suits real estate photographers, estate agents and high-volume shoots.
Best Camera Settings for Interior Property Photography
Starting points for aperture, ISO, shutter speed and white balance — and how to bracket so windows and interiors both hold detail.